
Organizing with My Clients
|


![]()
|
|||||||||||||||||||||||||
|
![]()
|
|||||||||||||||||||||||||
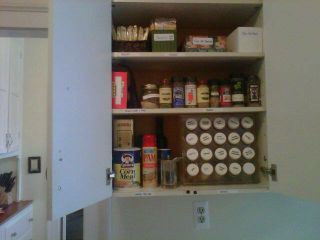

If I asked you to list all the items inside the kitchen cabinet under the sink. Could you? How accurate would your list be to the actual contents? What about other cabinets and drawers in your kitchen? If you can’t answer what’s inside, it’s time to organize. Follow these 3 steps.![]()

Whether you have a bit of clutter, or a full blown mess, the best first step to organize it is to sort and categorize. Separating items into groups of similar things is the easiest way to start any organizing project. Creating categories in which to sort items is always the first action I take when starting any organizing project. For example five categories used for clutter that had collected on a client’s table are; unopened mail, papers to address, stuff to read, items to address, and items to be put away. Categorizing the clutter allowed us to address each of the 5 groups one at a time. This moved the organizing process along successfully. So, the next time you feel stuck or unsure of of where or how to start an organizing project remember categorizing is the best first step.


Getting organized is a common New Year’s resolution. Is it one of yours? If so, start small. Make a list of what you want to organize and then ask yourself what first step can I take that will be easy for me to accomplish? Remember sometimes the smallest changes have the biggest impact.


How easy is it for you to get rid of stuff? Deciding what is worth keeping and what needs to go, can be difficult. I follow a three step confirming process. These three steps help me confirm what I have, and decide what I need, use, and want. The first step is to determine what I have. The second step is to decide what stays and what goes. The third step is to dispose of stuff. Let me explain how this confirming process works.

The first step is to determine what I have. This means gathering and assessing. I pick a small group of items to work with at a time. Instead of working with all my clothes, I work with just my spring wardrobe. Another example is instead of working with all my books, I only work with my organizing books. This helps reduce the time needed to complete the process, and helps prevent procrastination. Once I’ve chosen which category I want to work with, I gather the items into one location and assess them.
The second step is to decide what stays and what goes. I find it helpful to have criteria for what items stay and what items go. I call them my confirming guidelines, and they help me make decisions.
Examples of confirming guidelines:
1. It has to go if it’s broken, damaged, or missing parts, and you’re not going to fix it or pay to have it fixed within 3 months.
2. It has to go if it hasn’t been used in the past 3 years and won’t be used in the next 3 years.
3. It has to go if it is more than one size too big or too small.
4. It has to go if it’s torn, stained, or moldy, and you’re not going to fix it or pay to have it fixed within 3 months.
5. It has to go if it doesn’t reflect your current lifestyle. (Use 3 year timeline.)
6. It has to go if it’s very similar or identical to another item. Keep three favorites and the rest have to go.
7. It has to go if you’ve already purchased a replacement for it.
8. It has to go if it’s something you don’t like, or something that never worked right or fit right.
9. It has to go if the reason you’re holding onto it is not a good, valid reason. (See blog articles)
10. It has to go if it brings negative thoughts or causes self doubt.
The third step is to dispose of the stuff. It helps to schedule a day for removal, whether it is donations, items to be recycled or items to be given away. Voila! Confirming process complete.
© April 2017 Janine Cavanaugh, Certified Professional Organizer® All Rights Reserved


Follow Me