Tag Archive for: organizing tips

Clutter Free Gift Ideas

giftDo you like giving and receiving gifts? It can be fun, meaningful, and heartwarming.  Unfortunately, it can also make our home feel like it’s bursting at the seams with toys, clothes, and electronics.  After the gift giving season is over do you dread having to make room for all that stuff?  Do you detest having to shift things around, box things up, move things to the basement, or get rid of things, just to fit comfortably in your home once again?  Would it be nice if you could avoid all that?  I have 25 organizer friendly gift ideas that concentrate on giving and receiving consumables and experiences, not stuff.  Therefore, you won’t have to struggle with all that stuff, you can just make plans with family and friends and enjoy.

25 Organizer Friendly, Clutter Free Gift Ideas

  1.  A cultural experience to a play, performance, or theater
  2.  An adventure or fun family outing
  3.  Activities, clubs, classes, or lessons
  4. A day pass, membership or special program at a zoo or aquarium
  5.  A useful automobile related gift like car washing or detailing
  6.  A helpful housework booster
  7.  Tickets to a sporting event
  8.  Movie passes or movie night
  9.  Salon treatment or spa day
  10.  Gifts of time or a financial contribution
  11.  Food in one form or another
  12.  Donation to charity in recipient’s name
  13.  Fitness Membership or classes
  14.  Books or music for electronic devices
  15.  Tickets to a concert or musical performance
  16.  Involvement in nature clubs, groups or organizations
  17.  Shopping for charity
  18.  Membership or passes to a museum
  19.  Gifts of your time and memories
  20.  Small acts of kindness
  21.  Volunteering at a local food bank, homeless shelter, hospital, etc.
  22.  A small dose of nature like cut flowers, floral arrangements, or live wreath
  23.  Assistance for necessities to homeless, seniors, or anyone in need
  24.  Count your blessings and share them with friends and family
  25.  Gift certificate for my services

If you have other clutter free gift ideas please share them with me.

NAPO

Proud member of NAPO

Happy Holidays from the Helpful Organizer, Janine Cavanaugh, CPO®

©December 2014  Janine Cavanaugh, CPO® All Rights Reserved

Organizing Medical Papers

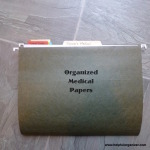
finished fileIn preparation for visiting a new doctor last week, I realized that my medical papers were not organized in a manner that was suitable to my needs. They were mostly organized in chronological order of doctor visits, and I wanted them organized by subject, and then, in chronological order of doctor visits. So, I gave myself the project of organizing my medical papers.

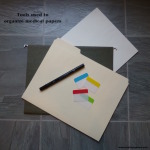
tools neededThe tools I used were a hanging file, a file folder, 8 sheets of paper, 8 tabs, a highlighter, and a black marker.  I first sorted all my medical papers into subject categories. I choose 8 different categories that made sense to me as I was sorting my papers. The 8 subject categories I used were general information, yearly physicals, mammograms, doctor visits, eyes, and 3 categories for specific ailments I have. Your medical categories may be slightly or completely different. That is understandable.  Personalization is encouraged.

Here is a list of the types of papers I have in each subject category:
General information – primary care doctor contact information, office hours and locations, medical insurance documents
Yearly physicals – medical history records, physical exam results, lab results, appointment reminders
Mammograms – test results, appointment reminders, literature on subject
Doctor visits – test results, appointment receipts, insurance explanation of benefits
Eyes – appointment receipts, exam results, prescriptions, eye glass receipts
Specific ailments – test results, appointment receipts, diagnoses, prescriptions, literature on subject
file names

I used the highlighter to mark the date and subject on specific papers. I used the tabs and paper to create dividers for each of my 8 subjects. I used the marker to write the subjects on the tabs. I placed all the tabs on the upper left hand side of the paper (horizontal) so they would fit into the file folder and be easier to read.  It’s much easier to scan one area for the subject tab, then have to scan staggered tabs, especially since we read from left to right. I reduced as many papers as I could before reassembling my medical file.  I shreded 56 papers that I felt comfortable discarding.

The project took me about an hour to complete. Since all of my papers were in one file folder and in a semi organized state, I was able to complete the project in a relativity short amount of time, but if you’re going to organize your medial papers and they’re in disarray you will need to give yourself more time to complete your project.  You will also realize as you sort your medical papers that your subject categories will be specific to you.  That is ideal.  Each and everyone of us needs to find a way of organizing that is personally suitable to our individual needs.


© December 2014  Janine Cavanaugh, Certified Professional Organizer  All rights reserved

NAPO

Proud member of NAPO

Save Time

key holderDo you feel that being organized could save time?  When I ask this question in the classes I teach on organizing, everyone says, “yes”.  They go on to say that one of the major time saving benefits of being organized is being able to find what they want when they need it.  They feel that being organized would mean that they would spend less time hunting for things, less time putting things away, less time stressing over misplaced items.  This is true.  In fact it’s been proven that organized people save themselves time every day.

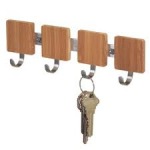
So, how can you make this happen for you?  You can make it happen by following a two step process.  Step one is to have or create a designated home for things, and step two is to consistently return things to their designated home.  For example, if I have a designated home for my keys (mine are on a hook by my back door), I know where they belong, and can put them in their designated home quickly and easily.  This encourages me to put them away, instead of just tossing them on the counter or burying them in my pocketbook.  Also, if  I consistently return my keys to their designated home, I know where to find them when I need them, and there is less chance of me misplacing them or loosing them.  This 2 step process works with everyday items like groceries, eye glasses, and receipts, as well as one-of-kind items like your passport, camera, and title to your car.

Although being organized can save you time, getting and staying organized requires time.  Unfortunately, it doesn’t just happen all by itself, but if you practice the two step process of creating a designated home for things, and consistently returning things to their designated home, it might feel that way.  What I mean is that once an action becomes habitual, less effort and brain power is required to preform the action.  So, it seems as though it is happening all by itself.  I’d recommend starting with just one items and one action, and see how long it takes for you to save time every day.


©November 2014  Janine Cavanaugh, Certified Professional Organizer®  All rights reserved

NAPO

Proud member of NAPO

Organizing is a Skill

calendarI’m often asked, “How come some people are so much better at organizing than others?  Is there an organizing gene?”  I’m happy to say that there is no organizing gene.  Organizing is a skill, and just like other skills, some people are better at learning it than others.  For example, typing, speaking a foreign language, and playing golf are all skills.  Yet, some people master these skills much faster than other people.  It’s the same way with organizing.  Some people master it much faster than other people, but everyone can learn the skill of organizing.

The key to learning any skill is practice.  Suppose you wanted to learn how to play the piano.  What would you do?  Would you sign up for piano classes?  Would you purchase a practice keyboard?  Would you seek instruction from a professional?  Would you read up on the subject?  Would you practice, practice, practice?  Yes, you would most likely do all, or most of these things, so that you could learn and improve.

Just like with other skills you need to practice organizing.  You need to devote time and energy into organizing on a regular, preferably daily, basis.  I understand that you may not want to practice organizing, because you feel as thought the outcome of your efforts won’t last.  Unfortunately, that is the case with any skill.  What would happen if you stopped practicing the piano for 3 months?  Would the efforts of your previous practice show?  What would happen after 6 months, or 12 months?  Also, what is the outcome if a beginner stops practicing after 3 months, as apposed to an experienced piano player?  The skill level you’ve mastered makes a difference.

So, how can you practice organizing?  Listed below are a few tasks you can do daily to practice the skill of organizing.  I’d recommend concentrating on mastering one or two of these tasks, and then moving on, after a few weeks, to include one additional task, and so on.

1.  Put all dirty clothes in hampers.
2.  Put all clean clothes where they belong.
3.   Put shoes, coats, and accessories where they belong.
4.  Open and process all mail.
5.  Clean all dirty dishes.
6.  Prepare your outfit for the following day.
7.  Prepare breakfast, and lunch for the following day.
8.  Make one phone call, or do one task from your to do list.
9.  Clear flat surfaces, like tabletops, desktops, counters, dressers, and floors.
10. Have 10 minutes of uninterrupted conversation with your family.

I’d like to hear about your progress.  How is your organizing skill developing?
© October 2014  Janine Cavanaugh, CPO®  All Rights Reserved

NAPO

Proud member of NAPO

Back to School Organizing Tips

Back to school
It’s back to school time.  Did you promise yourself that this year would be different?  Did you say you were going to come up with a plan to manage all the school papers and homework?  Did you have a great idea for organizing school lunches and backpacks?  What about homework?

It can be difficult to stay organized with school things when so much happens all at once.  However, it is possible with a bit of planning and some family guidelines.  Below are 10 back to school organizing tips to help you plan and establish family guidelines that will help you stay organized.  Allow yourself time (3 weeks) to transition into these guidelines, but stick to it, and you’ll see results.

Here are 10 back to school organizing tips:

1.  Create a defined drop zone for backpacks just inside the back door, and label a location for each pack.
2. Create a vertical inbox for all incoming school papers, and assign time on your daily calendar to look at these papers.
3. Label the vertical inbox with categories that make sense to you.  For example:  school handbook; schedules; menus; contacts; events.
4. Create a clearly defined homework area for each child, and assign time on your daily calendar to review homework.
5. Create a healthy snack box where kids can grab something good to munch on, to hold them over until dinnertime.
6. Establish one family calendar to post everyone’s schedule.
7. Plan school lunches for the week on Sunday, and assign time on your daily calendar to make them the night before.
8. Pick out school clothes the night before and have them ready to go.
9. Plan breakfast for the week on Sunday and have all menu items on hand .
10. Have each child contribute as much as they can to the family guidelines.  Organizing should be a group effort.

Please share any school related family guidelines that have been successful for your family.

©September 2014  Janine Cavanaugh, CPO®  All rights reserved

NAPO

Proud member of NAPO