How to Tackle Clean Out Projects
|
|||||||||||||||||||||||||
|
|||||||||||||||||||||||||
|
|||||||||||||||||||||||||
|
|||||||||||||||||||||||||
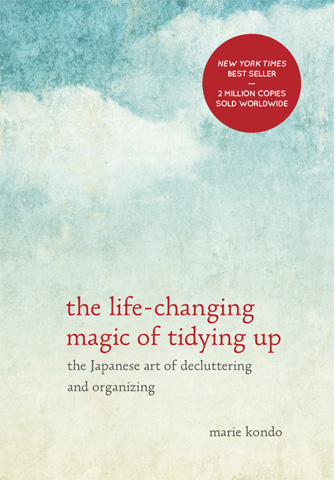
 The popular book by Marie Kondo, “The Life-Changing Magic of Tiding Up” has been a topic of many discussions between my Professional Organizer colleagues and myself. I found that I agree with many of Marie Kondo’s points, as long as you substitute the word organizing in place of the word tidying. Here is a list of 10 points on which I agree:
©March 2016 Janine Cavanaugh, Certified Professional Organizer® All Rights Reserved

How often do we organize? Do we let the mess and clutter build and build before you reclaim order? How do we decide when it’s time to organize? The answers to these questions vary for each individual, based on tolerance and desire.
Every individual has their own personal level of tolerance for disorder, meaning how much mess they are willing to live with before they clean it up. If we have a low tolerance for disorder, we don’t allow mess to happen or spread. However, if we have high tolerance for disorder, we find that clutter grows and spreads before we realize it’s out of control.
Additional, every individual has their own personal desired level of order, meaning how much clutter they can live with before they take action and remove it. If we desire a high level of order, we have systems in place that prevent clutter from happening. However, if our desire for order is low, we allow the mess to get out of control.
The best solution is to determine when it’s time to organize, and then take action before the mess and clutter get out of control. Here are 3 basic guidelines we can use to determine when it’s time to take action and organize.
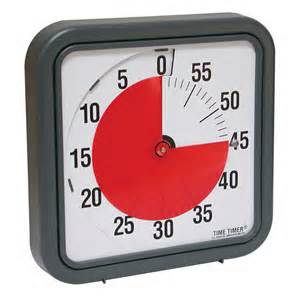
A Time Guideline is when we use a specific time or day as the cue to take action and organize. Here are a few examples. Every night before eating dinner, we put away what’s collected on the kitchen/dinning room table. Every night at 8:00PM, we organize and prepare for the next day. The last Saturday of every month, we take care of recycle items and donate items. Every September, we clean out the garage.
A Quantity Guideline is when we use a specific unit of measure to determine when it’s time to take action and organize. Here are a few examples. When our inbox is an inch deep, we process all the mail. When the shred box is full, we empty it by shredding it’s contents. When the magazine rack is full, we remove and recycle 5 magazines. When we have two weeks worth of old newspapers, we recycle them.
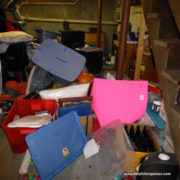
A Visual Assessment Guideline is when you use a specific visual cue to determine when it’s time to take action and organize. Here are a few examples. When we can’t see the desk, we organize the desk. When the floor of the walk-in closet is hidden, we organize the closet. When there are too many items on the kitchen counter, we clear it off and put things away.
Based on our personal tolerance and desire we’ll be drawn to a specific type of guideline. The key is to find guidelines that work and stick with them, because trouble occurs when we don’t establish any guidelines, we ignore our guidelines, or we’re unable to maintain our guidelines.
So, the best way to decide when it’s time to organize is to first look at our tolerance for disorder and our personal desired level of order. Second, establish organizing guidelines. Third, follow the guidelines that have been established. Remember, the best guideline is the one we will DO.
© February 2016 Janine Cavanaugh, Certified Professional Organizer® All Rights Reserved
 Have one empty container in each room of the house. At the end of each day, go room by room, and put any clutter that has accumulated into the empty container. At the end of each week, remove the contents of each container by putting items where they belong and tossing what you don’t need.

I’ve always liked the idea of New Year’s Resolutions. Starting a new year with an intention to better my life in some way, is very appealing to me. Many people include an organizing project or habit as part of their new year’s resolution. As a Professional Organizer, I fully support this. However, I’d like to offer another option that can help you help others, as well as, help you get organized. This year, my new year’s resolution is to perform at least one small acts of kindness each week. This idea was sparked by a newsletter I received last year with a list of 60 small acts of kindness. Many of the listed acts encourage you to perform organizing actions as well. Maybe this list will inspire you to help others and get organized.
List provided by Mike Michel from R.S. Gilmore Insurance Agency, Inc.
© January 2016 Janine Cavanaugh, Certified Professional Organizer® All rights reserved


Follow Me