 Putting things away is a very important part of organizing. It needs to be simple and easy. If it isn’t easy, we don’t do it. Therefore, a simple storage solution is the best solution.
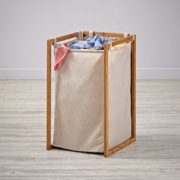
For example a client of mine mentioned that she was frustrated with her children for leaving their dirty clothes on the floor where they took them off. I asked her where she wanted the dirty clothes. She walked into the bathroom, opened a linen closet, slid out the hamper, took off the lid, and pointed inside. I then asked her where her children changed into their pjs at night. She said right inside her bedroom door. So, she was confronted with a pile of dirty clothes each time she entered her bedroom. I’m sure we can all understand why she was frustrated. Laundry is a never ending chore that is only simplified with help from all family members. Can you guess at the solution we found? We found one that was simple and easy for her children to adopt. We moved the hamper to a spot by her bedroom door and took off the lid, and let all the children know that they were expected to put their dirty clothes in the hamper.
Another example is a client of mine explained how frustrated she was when her children left their bicycles all over the place. They were in jeopardy of getting run over when they were left in the driveway. They were always getting wet when they were left out in the rain. They were tripped over when they were left by the back door. I asked her where she wanted the bicycles to be when not in use. She answered honestly, that there was no specific spot for the bicycles to be put away, but in the winter they were up on hooks in the garage. This is understandable. Often, seasonal items are either in use or packed away. So, after some discussion we came up with a simple solutions. We used tape to mark off parking spots for the bicycles in the garage. We also labeled each parking spot and let all the children know that they were expected to park their bicycles in their spots at night.
In both of these examples we were able to find a simple storage solution with some discussion and planning. I encourage you to do the same. Keeping things organized will be much easier if you do.
© October 2016 Janine Cavanaugh, Certified Professional Organizer® All Rights Reserved
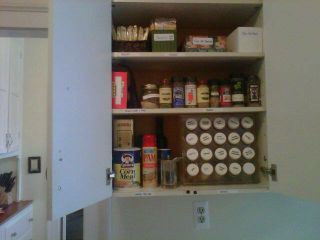
 Before stocking the pantry with items for your Thanksgiving feast, organize it. Clear off one shelf at a time. Check expiration dates. Remove all expired items. Donate anything you won’t use before the expiration date to the local food bank. Group like items together and put back in the pantry with the closest expiration dates in front.


Follow Me